Remote Monitoring of Solar Charger
Remote Monitoring of Solar Charger
by rdpecken on Sep.25, 2014, under Electrical
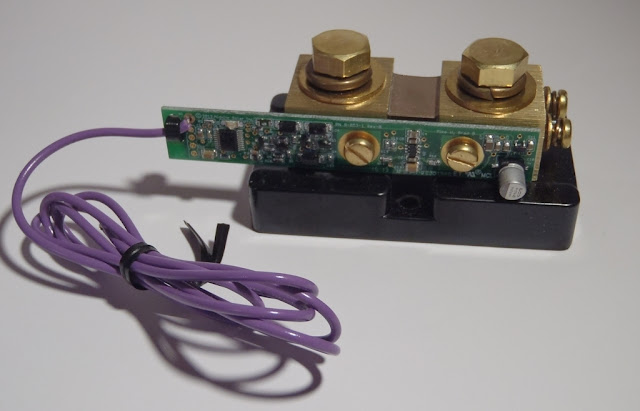
Over the labor day weekend, I installed a new add-on for my solar power charge controller. It is called a Whizbang Jr.
Basically, this allows the charge controller to measure the actual current directly into and out of the battery bank, without worrying about what loads I might have turned on at any point in time.
This allows the charge controller to make better decisions on when to stop charging on any given day, putting less strain on the batteries. It also will allow me to more effectively monitor the actual state of charge of the batteries, rather than guessing based on battery voltage. But that part hasn’t been added to the software, yet.
I haven’t grabbed any photos of my install yet, but here is a generic one that I’ve borrowed from the manufacturer…
I also did some work to allow me to remotely monitor the charge controller operation. This way, I can bring up a display of how much power I am generating at any given time, along with battery voltage, and other related measurements. So if something goes wrong, hopefully I will be able to see it before it causes permanent damage to the batteries or system.
I ran an ethernet cable from my Router/Switch on the west end of the house over to the equipment cabinets on the porch. This goes out of the bottom of the cabinet, under the porch and back up into the house through a conduit. Then the wire runs inside the south wall, through all of the studs, until it exits near the router.
After getting the physical connection up, I had to set up the various parameters to allow the charge controller to communicate over the network. I started with the IP address that I had left in when I was testing a few months ago. This was not working now. Then I discovered that my new phone had connected using that address (I hadn’t reserved the address yet), so it was interfering.
Next, I changed the address to one just outside of the range of numbers that get assigned automatically, to keep that from happening again. With that change, I was able to connect with the local application on my iPad, as well as through the internet to the myMidnite website.
I thought everything was fine then, so I buttoned it up. After leaving the next day, I checked the myMidnite website from Mesa when I got home. It was not working! After much troubleshooting, I figured out that the wireless camera on our front porch was now interfering. Turns out that I had assigned that same address to the camera last year. Since I unplug the camera when I arrive to avoid a multitude of alarm emails, it was not interfering while I was on site. But the last thing I did before leaving was plug the camera back in. So 10 minutes after I left, the charge controller stopped communicating.
I figured out how to log into the camera remotely and change the address on the fly (dangerous, but I got lucky). After that, both the charge controller and the camera have been working fine.
Here are some screen shots of the various monitoring tools I have so far.
From my iPad, I can run a real-time set of gauges to see the state of the system.
Then there is a tool that graphs various items over the day, week, month or year.
In this one, for the daily graph, I have selected Instantaneous Power, Input Voltage from the Solar Panels and Battery voltage.
For the weekly graph, I’m looking at total daily power generated (Kilowatt Hours), along with the amount of time that the battery has been fully charged (float mode).
Then, for the monthly graph, I’m looking at the low battery voltage, the high battery voltage and the float time for each day. This lets me see how far I’m drawing down the batteries each day.
Pretty cool for me… I can’t wait until they add State of Charge and Amp Hours In/Out.


Comments
Post a Comment