Solar Panel Installation
Solar Panel Installation
by rdpecken on Mar.17, 2013, under Electrical
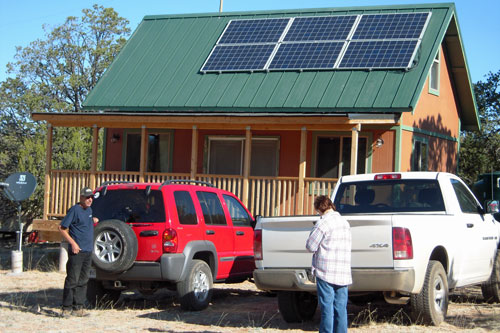
Well, Spring is here, and it’s time to get back to work. For Spring Break this year, we came up to install a solar panel on the roof of the LittleHouse.
We got a pretty late start, because the Ranch had 6-8″ of snow over the weekend, and we didn’t want to fight the muddy roads coming in. I also had some testing to do at work that really couldn’t wait. So we ended up coming up on Wednesday, instead of the normal Saturday arrival. The good part is that the weather was perfect. Highs in the 70’s, lows in the 40’s. Warm, but cloudy sometimes on Friday and Saturday.
On Thursday morning, we started planning the install. The first thing we found was that the supplier had shorted us by 4 clamps. So we had to redesign the clamp pattern to accommodate having a few less. I think we still have enough, but it sure gets frustrating.
The next setback was my fault. When I ordered the clamps, I took the size that they said fit 85% of all installations, based on the shape of the standing seams on the roof that they would clamp to. It never occurred to me that they would not fit the panels themselves. But woe is me… they are about a tenth of an inch too big to clamp the panels securely. So I had to McGuyver it (Anybody remember that guy?, he could fix anything with duct tape and bubblegum.) We went into Kingman and picked up some 3/8″ washers and some JB-Weld. When we got back, I glued the 3/8 inch washers to the clamp assembly in all the right places to make up for the 1/10″ difference. It worked fine.
So the next morning, Tara and I started lifting the panels up and I clamped them to the roof. We strapped two ratcheting hold-down straps to the ends of each panel, and hooked a rope to them. Then I pulled the panels onto the roof. They are only about 40 pounds each, so it wasn’t too bad.
Once a panel was on the roof, I threw the rope over the roof, and Tara pulled from the other side, while I pushed them up the ladder and into place on the roof. Then they were clamped into place.
The clamps are designed to pinch across the standing seam of the roof panels, creating a dimple in the metal, with a fat part all around to make it stay in place. I tried mounting the clamps to the seams using a socket wrench to turn the setscrews. What they did was walk up the seam, and only pinch very near the top. So they were not very sturdy. After several retries, I found that installing them with a drill driver first made the clamp pinch so quickly, that it didn’t have time to walk up. So the first row of clamps was started this way, and torqued to specs with a torque wrench. I later found that for the other rows, I could use just the wrench, as long as the panel was resting on top, and I was pushing down on the panel.
Tara and I got two done by the time John arrived on Friday to help. With John’s help we got the third one on the top row into place before sunset.
That evening, John cooked up some huge hot dogs he had gotten from French’s Meat Market in Tempe.
The next day, we all worked on getting the other three panels installed. They are connected in two rows of three panels each. Each row gives us about 90 volts at 8 – 9 amps out at the peak of the day.
So now the hard part is finished, and the next part is to bring the wires down into a combiner box to tie everything together to feed our charge controller for the battery array. Stay tuned…


Comments
Post a Comment