Building the Littlehouse Porch
Building the Littlehouse Porch
by rdpecken on May.28, 2011, under porch
We came up in April to build the deck, this would serve as the floor for the planned covered/screened porch on the Littlehouse.
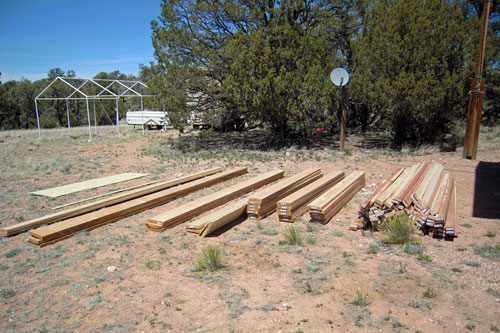
It was a pretty heavy load, but here it is unloaded, ready to start.
We decided that since this was to be a covered porch, we didn’t need to go with the much more expensive engineered deck wood that has become popular. Instead, we would build the beams and joists from normal douglas fir, and use redwood for the deck boards. Since they will have a roof and screened walls around them, we don’t expect to have to do a lot of maintenance to them.
So the first thing to do was to square up the porch beams with the rest of the house. We ran a string line along the two beams under the house, and extended it out to the porch area. That should be pretty close to square. We don’t need to be exact, since with beams are 6″ longer than the porch, we have some wriggle room.
We built the beams such that their joints would be directly over a pier. That way there is very little stress on the joints.
We found that the crappy lumber we got from Lowes varied in width about a full half-inch from one board to another. It’s sad that you come to expect that even though 2×10 doesn’t really mean 2×10, but also that 2×10 doesn’t mean the same thing from board to board! So to get around this, when we glued the boards together to build the beams, we lined up one edge, then after they had dried, we used the circular saw to trim off the excess on the boards that were wider than the others. Ridiculous…
Once the beams were bolted into place, we lag-bolted the rim joist to the house to connect the porch and house together. Not totally necessary, since the porch had two rows of piers, but seemed like it would give us an easy way to secure the end of the floor joists using simpson hangers.
Our camera battery died before the end of the trip, so we took some photos on the next trip of the porch as it had been left in April.
We didn’t get the rim in place all the way around, but all of the decking is in place with at least two screws in each end.
When we arrived in May, our goal was to finish putting all of the screws (2 – every 16″ in each board) into the deck planks. Then we filled all of the countersunk holes with wood putty. This was then sanded level with the deck boards to just leave little circles of wood filler where the screw heads were.
Because we know that it will take a while to get a roof overhead, we decided to go ahead and stain/seal the deck to hopefully keep it from turning grey and deteriorating in the sun. I had read on the internet that Cabot stains had good reviews, so that is what we chose. It is a semi-transparent, which is supposed to mean that the wood grain still shows through, but there is some pigment built in. The results were not at all what I expected, and I’m kind of displeased with it. The stain didn’t seem to soak in, but just stayed on top. We had even sanded and cleaned the surface before applying it. Hopefully it will look better when it dries. If not, I guess that we’ll be stripping it off once the roof/walls are complete. Once everything else is finished, I’ll most likely add the railing.
We built some makeshift fencing around it to keep the dog from jumping up on it while it was wet.
There was a storm moving in in Wednesday, so we got the stain down on Monday afternoon/evening. Surprisingly, it had not dried by 10:00 am on Tuesday. We are hoping that it had a chance to dry through the rest of the day before the rains came on Wednesday. I guess we’ll find out when I go back up in June.
May 31st, 2011 on 6:20 pm
Wow! Randy, I’m impressed. Your new deck looks great. The stain you used looks and sounds like the stain we used on our deck up in Idaho. It worked out pretty well on that uncovered deck.
Congratulations! sls


Comments
Post a Comment