Fresh Water Plumbing for LittleHouse
Fresh Water Plumbing for LittleHouse
by rdpecken on Mar.18, 2010, under Plumbing
Spring is finally here, just barely… We arrived on March 13th just as a cold front was blowing through. There was still a bit of snow on Black Mountain left over from the last storm a week ago.
 A little snow on Black Mountain
Sarah and her family came up to visit overnight on Sunday. The night before they arrived, we had a low of 20 degrees F. Fortunately, the front had passed through by Sunday evening, and the low that night was only 34 degrees. Much more comfortable for sleeping.
We got started on Saturday by climbing up to the inside peak of the roof, and using the vent screening material to force a tight fit between the roofing underlay and the sheathing at the top near the vent. That seems to have stopped all of the flapping noises we have put up with over the last couple years whenever the wind would blow.
Next, we started running the fresh water lines in the Littlehouse. We chose to try PEX tubing for the plumbing, as I had experienced some trouble with joints on the copper piping when we built the shed a few years ago. We thought that the PEX would be easier to make good joints with, especially in tight places where a torch would not be so good.
We learned some things about PEX as we went, and I will touch on them as I go.
I thought I would run all of the fresh water plumbing inside the walls, so that they would be inside the conditioned space, should we ever decide to keep them in use over the winter. If I were to do this again, I would probably choose to run them under the floor, but still inside the insulation of the floor. That would accomplish the same thing, and would have been much easier to install.
The first thing we noticed was that the 3/4 inch PEX was much stiffer that I had imagined. It was very difficult to bend, almost as stiff as PVC pipe. We found that we could not make it bend around 90 degree corners within a 5″ – 6″ radius. If you want to do 90 degree turns with this stuff, you need to give it 16 inches or so. So we ended up using 90 degree elbows at the corners. Fortunately, I had brought some along, just in case…
 90 degree elbows
The other problem that the lack of flexibility led to was the difficulty in passing the line through studs that were less than about 16 inches apart. Our drill could not fit in tighter spaces, and some of the jack studs and sections where wall sections came together required us to drill angled holes through them. Then when we tried to pass the PEX through, we couldn’t easily bend it to make it through both studs. We ended up needing to drill larger holes (1-1/2 inch) in those spots. I didn’t like that, as it surely weakened the walls there. It should be OK, as we have 6 inch studs, and doubled up in those spots. But I still don’t like it.
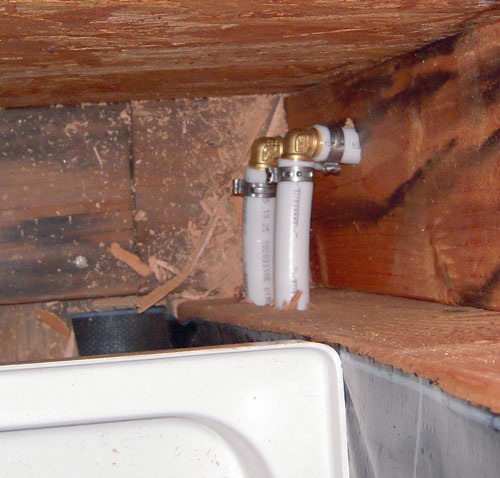
So we started at the washer location on the south wall of the kitchen. This was the point furthest from the source. We ran two runs of 3/4 inch PEX there, and added a 3/4″ to 1/2″ adapter to transition to the 1/2 inch PEX. That was then connected to a 1/2 inch pipe to jut through the wall.
 Washer Location
Next, we moved over to the location of the Kitchen Sink, under the window on the south wall. We installed two 3/4″ x 1/2″ Tees to transition to the outlet pipes there.
 Kitchen Sink Water Lines
That took care of the south wall needs, and pretty much used up our Sunday.
Continued next post…


Comments
Post a Comment