Finishing the Washhouse Shower
Finishing the Washhouse Shower
by admin on Mar.23, 2006, under WashHouse
Shower Walls
March, 2006.
After carefully measuring and cutting the holes for the shower valve and a notch for the shower head, we installed insulation in the walls and ceiling surrounding the tub. Then the shower walls were installed. First the back wall is set in place, then the sides interlock with the back wall. You then level the side walls and fasten them in place (I used screws). Finally the back wall is fastened in place.
Green Board
March, 2006.
Then Green Board (Kind of like drywall, but more water resistant) is cut to fit into place. I would have liked to use larger pieces for less joints, but the board is just too heavy and bulky to handle in this small space. There are quite a few rough spots that will need to be smoothed out when we tape and plaster it, but it’s dry and clean for now.

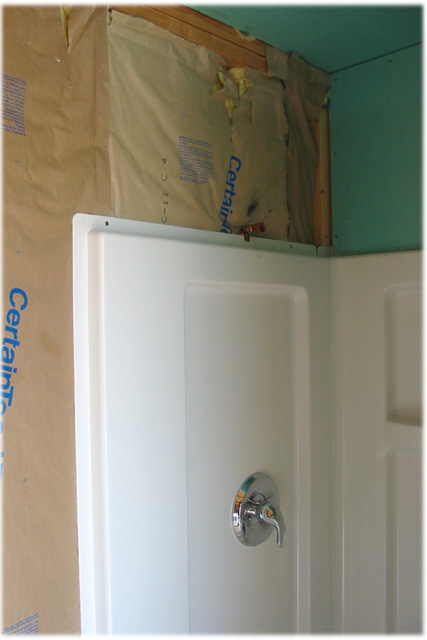
Oops…
March 2006.
We couldn’t figure out why the water wouldn’t flow in the shower. We thought that maybe the pipes had frozen the night before, although we had allowed them to drain.
We brought in propane heaters for a couple of hours, but they didn’t help. Finally, we pulled off the green board and shower wall on the fitting side, and pulled the valve. With a little residual pressure in the pipes from our tests, it was obvious that water had gotten to the valve, as it sprayed out all over us.
When I took apart the valve and examined it, I was able to guess that our problem was that both the hot and cold sides needed to be pressurized at the same time. It has a safety feature to keep the temperature steady when pressure on the hot or cold side changes in relation to the other side. We had been testing by pressurizing just one side at a time, since the water heater was not yet installed.
So we made a little test jig to pressurize both sides at once…

Test Jig
March, 2006.
It is simply a Tee connector with 1/2″ fittings on all three ends. We feed the output of our pump to the middle, and each end goes to either the hot or cold water pipes for the wash house.
So after wasting a half day debugging this non-problem, we put the shower walls and greenboard back into place.

Pressure Test
March, 2006.
With the jig in place, we can pressure test both the hot and cold water sides at the same time.
For testing, we pulled water from the blue jug, into the pump, then connected the output of the pump to our plumbing. The pump is an RV type 12 volt unit. So the battery supplies power for the test.

Finished Shower
March, 2006.
After the shower walls were put back together, we installed the shower head using our favorite sealant.
So here is the finished shower stall installed and working.


Comments
Post a Comment