Framing the WashHouse
Framing the WashHouse
by admin on Aug.12, 2004, under WashHouse
Two Walls Up
We started on the east wall. After nailing it together on the floor, we squared it up and attached a temporary cross brace to keep it from racking as we lifted it into place.
Then we held it in place with two more temporary supports to the floor platform.
The north wall was small enough that it didn’t need the extra supports.

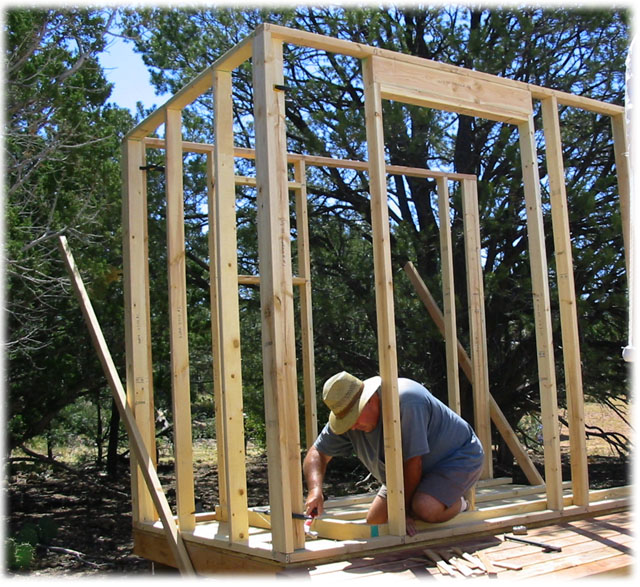
Framing the Walls
Here, Randy builds the last wall on the floor, ready to raise into place.
Walls Framed
Here, all four walls are framed.
The temporary supports have been removed, and we are ready for the roof.
Notice that the shed roof pitch is determined by the extra top plates on the front side. It is a small roof, so doesn’t need a lot of pitch, especially in the relatively warm and dry climate here.

Our First Guest
This little guy had taken up residence under our floor while we were gone. When we started hammering everything together, he was running all over looking for a quiet spot.
He was about 2″ across, and ran very fast! We had a hard time getting a picture of him. By the time we got focused on him, he ran every time.

Siding Applied
After putting the main part of the siding on, we went to work on the roof sheathing.
We were kind of in a hurry to finish this, as it was threatening to rain, and the OSB plywood doesn’t do well when it gets wet.

Rain Threatens
We ended up having to cover the roof with a tarp for an hour or so, while the rain came down. Afterwards, we were able to climb up and finish it off.
After the sheathing was down, Randy applied roofing felt, drip edges, roll asphalt roofing, and sealent.

North Side
Well, here is how we left it.
We used strips from spare siding to cover the opening left by the pitch of the roof on the north and south sides.
You can see the drip edge goes all the way around. Probably not necessary, but it looks nice.

South Side
Here is the view of the south side.

East Side
This is the back of the wash room. The window is attached to the studs under the siding. You can see the “bird hole” vents under the eave, which are covered with screen to keep critters out.

West Side
This is all we got done for this trip.
We had a tough time putting the door in, as I had forgotten the level. It works pretty good, but we will straighten it a bit next time we are up.
We are ready for external paint and trim, and door hardware and sill.
Some stairs would be nice at this point.

Our next trip will probably be to attend to some of these items, and to correct the minor problems we had on our previous trip.


Comments
Post a Comment