Laying the Septic Lines
Laying the Septic Lines
by admin on Jun.30, 2004, under Septic System
Septic System Installation June 27 – 28, 2004
——————————————————————————–
The process comes to an end with the installation of the lines from the house sites, and the washroom site.
The layout of the Septic Tank Lines was absolutely perfect to get this sewer line installation completed as fast as possible. All the strings are to work out the angles such that we could make all of the turns with 45 degree and 22.5 degree angles. These are the two most common angles available in building supply outlets.

Digging
We were fortunate to have a site with a natural 2% grade built in. For
the most part, we simply dug all of the trenches at a constant depth of
18 inches, and let the natural grade supply the slope for us. The slope
is very important for the septic installation
process since we don’t want our sewage getting clogged once everything
is built over it.

Even though the digging was easy, we had a little trouble with the trencher we rented from Chino Rental. The pin which holds the boom control kept vibrating out, which caused the control to fall off in our hand.
Finally, after the sewer lines were in, we let the trencher sit for a hour or so, while we cleaned out some cactus from our future water tank site. When we tried to use the trencher again to dig in those lines, the chain refused to turn anymore. It looked like a bearing had either fallen off, or been left off of the chain mechanism.
We explained this to the rental place on returning it, but they did not seem concerned, other than asking us if we got all of our trenching done.
Cutting the ABS
We used a normal crosscut saw to make our cuts in the ABS pipe. We laid
out the fittings on each end, and measured the distance between them,
adding 3 inches for the part inside the two fittings. (Each 3 inch pipe
fitting had 1.5 inches on each end for the pipe to attach to.)
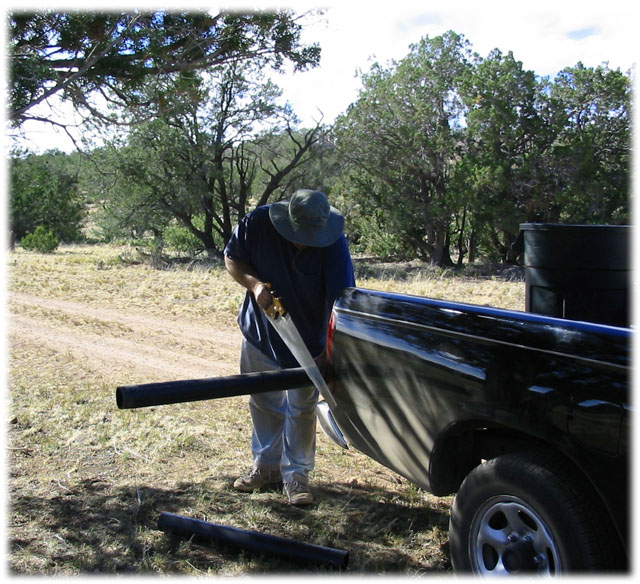
Deburring the Pipe
The crosscut saw leaves a rough edge, so we cleaned them up with a pocket knife. That way the pieces fit together easier.

Joining the Parts
We tried to do most of the solvent welding in a comfortable position.
Obviously, we had to do some of it down in the dirt, in the trenches.
First we apply a solvent to each piece, followed by ABS glue. Then we
just pressed the pieces together, with a quarter turn. Make sure the
pieces are facing the right way at the end of the twist.

Fitting the Lines
Before placing the pipes in the trench, we used a level to make sure
that section of the run was downhill all the way. It turns out that our
natural grade is about a full bubble off level, which should be plenty
for “stuff” to flow downhill.

We used the sticks to hold the lines in place above the trench, while we checked lengths. Then the two sections to be joined were prepared and glue was applied. We then lowered the new section into the trench and pressed/twisted them together.
Finished
After assembling all of the pipes, with cleanouts where appropriate, and
terminating them with a 45 degree connection under each building, we
packed up the trencher and returned it to Chino Rental.


Comments
Post a Comment