Installing the Septic System Chambers
Installing the Septic System Chambers
by admin on Mar.29, 2004, under Septic System
Septic System Installation 27 – 28 March, 2004
——————————————————————————–
The process continues with the installation of the leech field.
The eliminator chambers are installed in a level ditch, about 3 feet wide, and covered with at least 18 inches of soil.
Because we have about a 3% slope in the meadow, we had to dig about
4-1/2 feet on the upper end, and about 2 feet on the lower end.
Installing the leech field.
The process is something like this:
- Dig 6 feet of trench.
- Level the floor of the trench.
- Place the chamber in the trench.
- Level the chamber.
- Screw the chamber to the previous one.
- Partially cover with dirt to prevent movement.
- Repeat as necessary.

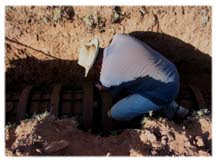
Connecting the chamber to the previous one with screws.
When leveling the chambers, you can scoop some fine dirt along the
sides. Then pick up and kind of shake the loose end of the chamber to
work the dirt under the sides in the low spots.
Two rows complete, one to go.
The first row has 6 chambers, the other two rows have 7. End caps are
screwed onto each end. Splash plates (some flat rocks) are placed at the
inlet to each row to prevent erosion.

The next step is to install the distribution box, which splits the water into the 3 different chambers. Then the plumbing from the septic tank to the distribution box. Doug will do that alone, as having more people doesn’t really make that part go easier or faster.
Finally, we will need to plumb to the inlet of the septic tank from each house as they are built.
Here is a short (25 seconds) video of the backhoe doing some digging.
It is about a 2mb download, so it will take awhile if you are on a dialup line.
The septic system permit was issued in the third week of April, and the installation was inspected and approved at that time.
Doug will return the week of April 25th to cover the trenches and tank. Then all we need to do is pay for it!


Comments
Post a Comment